Ultra Clear Epoxy is gaining popularity for its stunning, glass-like finish, offering artists and creators a versatile medium․
Radio Ultra broadcasts alternative and progressive youth music, mirroring the innovative spirit found in epoxy resin artistry․
Like Dislike influences the station’s playlist, much like careful mixing impacts epoxy’s clarity and final aesthetic․
What is Ultra Clear Epoxy?
Ultra Clear Epoxy represents a specialized formulation of epoxy resin designed for exceptional transparency and minimal yellowing over time․ Unlike standard epoxies, its refined chemical composition allows light to pass through with remarkable clarity, creating a glass-like effect ideal for embedding objects, creating deep pours, or coating surfaces where visual depth is paramount․
Similar to how Radio Ultra focuses on a specific music genre, ultra clear epoxy excels in a niche application․ Just as listener preferences shape the station’s playlist, precise mixing ratios and techniques are crucial for achieving optimal clarity․ It’s a material demanding attention to detail, mirroring the dedication of groups like Implozia․
Benefits of Using Ultra Clear Epoxy
Ultra Clear Epoxy offers numerous advantages for artistic and functional applications․ Its exceptional clarity showcases embedded objects beautifully, creating stunning visual effects – much like Radio Ultra showcases emerging musical talent․ The resistance to yellowing ensures long-lasting brilliance, preserving the initial aesthetic․
Its durability provides a robust, protective coating, and its versatility allows for diverse projects․ Just as a ‘Like’ on a song helps tailor your ULTRA experience, careful application yields superior results․ It’s a medium that rewards precision and patience, mirroring the dedication of artists and musicians alike․
Materials and Tools Needed
Essential supplies include epoxy resin, hardener, mixing tools, safety gear, molds, and optional colorants․ Like building a playlist on ULTRA, preparation is key!
Epoxy Resin and Hardener
Selecting the right epoxy is crucial for achieving that coveted ultra-clear finish․ Opt for a resin specifically formulated for clarity, often labeled as “casting” or “tabletop” epoxy․
The hardener is the catalyst that initiates the curing process; always use the hardener designed for your chosen resin – compatibility is paramount!
Just as Radio ULTRA curates its musical selections, precise ratios of resin to hardener are vital․
Different epoxy systems have varying mix ratios (e․g․, 1:1, 2:1 by volume or weight), so carefully consult the manufacturer’s instructions․
Using the correct ratio ensures proper curing, optimal clarity, and prevents a sticky or cloudy final product․
Mixing Cups and Stir Sticks
Graduated mixing cups are essential for accurately measuring resin and hardener volumes, mirroring the precision needed for a curated radio playlist like on Radio Ultra․
Choose disposable cups to avoid contamination and simplify cleanup․ Silicone cups are reusable but require thorough cleaning․
Stir sticks should be flat and wide to effectively scrape the sides and bottom of the cup, ensuring thorough mixing․
Wooden craft sticks or plastic stirrers work well; avoid porous materials that can introduce bubbles․
Like a DJ blending tracks, gentle yet complete mixing is key to a flawless result․
Safety Equipment (Gloves, Respirator, Eye Protection)
Protecting yourself is paramount when working with epoxy resin․ Just as Depeche Mode cautiously planned their tour after Ultra, prioritize safety․
Nitrile gloves prevent skin contact, avoiding irritation and sensitization․ Eye protection, like safety glasses, shields against splashes․
A respirator with organic vapor cartridges is crucial, especially in poorly ventilated areas, safeguarding your lungs from fumes․
Work in a well-ventilated space, similar to a radio station broadcasting clear signals (Radio Ultra)․

Always read the Safety Data Sheet (SDS) for specific hazards and precautions․
Molds or Project Forms
Selecting the right mold is key to a successful epoxy project, much like a radio station (Radio Ultra) needs a platform to broadcast․
Silicone molds are ideal due to their flexibility and non-stick properties, allowing for easy demolding․ Rigid plastic forms work well for specific shapes․
Ensure your mold is clean, dry, and sealed to prevent epoxy leakage and unwanted adhesion․ Consider using mold release agents for complex designs․
Proper form preparation, like curating a playlist (Imploziya on Radio Ultra), ensures a smooth and polished final result․
Think about the desired shape and size before pouring!
Colorants and Additives (Optional)
Enhance your epoxy creations with colorants and additives, similar to how Radio Ultra diversifies its music selection with new artists like Imploziya․
Epoxy-specific pigments, mica powders, and dyes offer vibrant, consistent color․ Use sparingly to maintain clarity, especially with ultra-clear epoxy․
Additives like glitter, dried flowers, or small objects can create unique effects․ Ensure they are fully encapsulated for a smooth finish․
Remember, like a listener’s ‘Like’ or ‘Dislike’ influences the station, additives impact the final aesthetic․
Always test colorants in a small batch first!
Leveling Tools
Achieving a perfectly level surface is crucial for ultra-clear epoxy, much like Radio Ultra strives for a consistent broadcast signal․
Spirit levels are essential for initial surface checks․ Use shims to correct any unevenness before pouring․
Plastic spreaders and silicone spatulas help distribute epoxy evenly, preventing high or low spots․
A heat gun (used cautiously!) can gently manipulate epoxy flow, aiding in self-leveling․
Like carefully curating a playlist, precise leveling ensures a flawless, professional finish․
Preparing Your Workspace
A clean, dust-free area is paramount, mirroring Radio Ultra’s clear signal․ Control temperature and humidity for optimal epoxy flow and curing success․
Ensuring a Clean and Dust-Free Environment
Maintaining a pristine workspace is absolutely critical when working with ultra clear epoxy․ Even microscopic dust particles will become permanently embedded, clouding the resin’s transparency and ruining the final finish․ Think of Radio Ultra’s commitment to a clear signal – the same principle applies here․
Thoroughly sweep, vacuum, and wipe down all surfaces with a tack cloth before beginning․ Consider using plastic sheeting to cover surrounding areas, minimizing potential contamination․ Close windows and doors to reduce airborne particles, and avoid working in areas with high foot traffic․ A clean environment guarantees a flawless, crystal-clear result․
Temperature and Humidity Considerations
Optimal temperature and humidity levels significantly impact ultra clear epoxy’s curing process and final clarity․ Ideally, work in a temperature-controlled environment between 70-75°F (21-24°C)․ Similar to how Radio Ultra broadcasts a consistent signal, stable conditions are key․
High humidity can cause cloudiness and prolonged curing times, while low temperatures can increase viscosity, making mixing difficult․ Aim for humidity levels below 50%․ Monitor these factors closely, as deviations can compromise the epoxy’s performance and aesthetic qualities, resulting in a less-than-perfect finish․
Surface Preparation (Cleaning and Priming)
Thorough surface preparation is crucial for optimal adhesion and a flawless finish with ultra clear epoxy․ Begin by meticulously cleaning the surface to remove all dust, grease, and contaminants – much like ensuring a clear signal for Radio Ultra․
Use a solvent like isopropyl alcohol․ Priming porous surfaces is often necessary to prevent air bubbles and ensure even epoxy distribution․ A properly prepared surface guarantees a strong bond and prevents imperfections, mirroring the careful curation of music for a discerning audience․
Mixing Ultra Clear Epoxy
Precise mixing of resin and hardener is vital; ratios dictate the final product’s properties, similar to how Radio Ultra curates its playlist․
Precise Resin to Hardener Ratio
Achieving optimal clarity and cure relies heavily on accurate measurement․ Most ultra-clear epoxy systems require a 1:1 or 2:1 resin-to-hardener ratio by volume or weight – always confirm your specific product’s instructions․
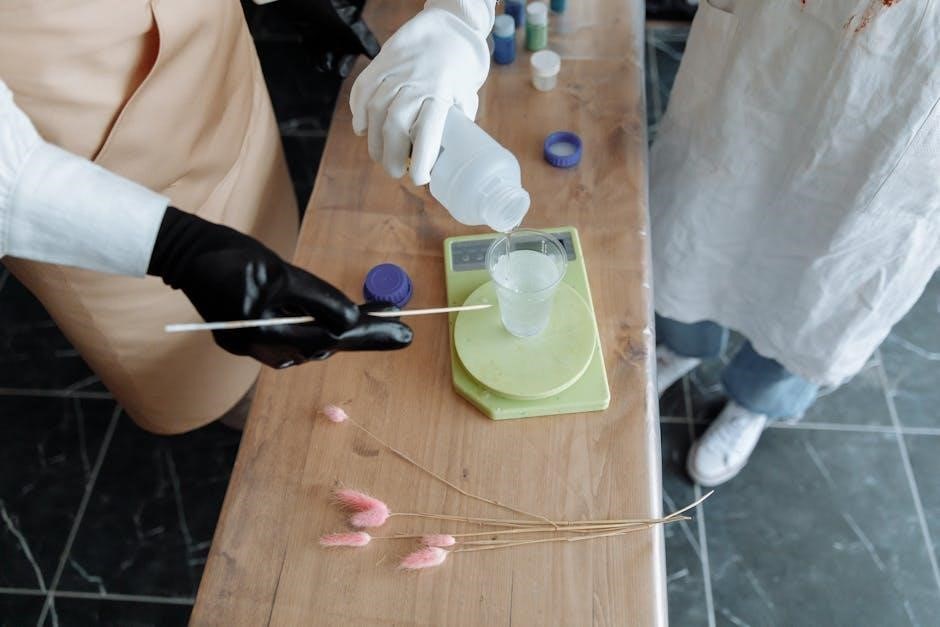
Using kitchen scales for weight measurements offers superior accuracy compared to volume-based methods․
Incorrect ratios can lead to a sticky, uncured finish or a cloudy, brittle result, mirroring how a misbalanced playlist impacts listener enjoyment on Radio Ultra․

Carefully measure each component before combining, and remember that even slight deviations can affect the final outcome․
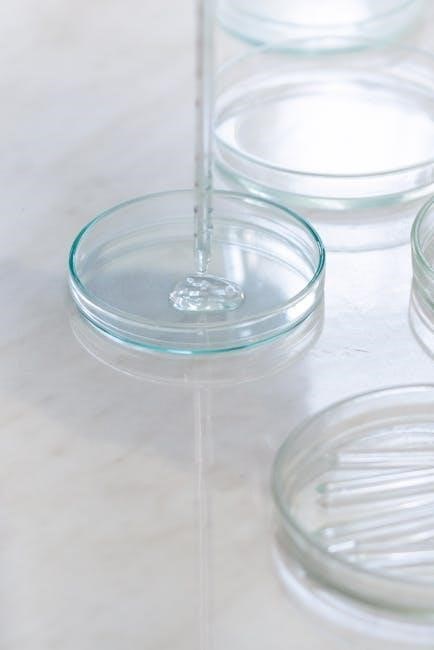
Proper Mixing Techniques (Slow and Thorough)
Gentle, deliberate mixing is crucial for ultra-clear epoxy․ Avoid vigorous stirring, which introduces excessive air bubbles – akin to disrupting the smooth flow of music on Radio Ultra;
Instead, use slow, sweeping motions, scraping the sides and bottom of the mixing container to ensure complete incorporation of resin and hardener․
Mix for the recommended time (typically 2-3 minutes), even if the mixture appears clear initially․
Thorough mixing guarantees a uniform chemical reaction, preventing cloudy patches and ensuring a flawless, transparent finish․
Avoiding Air Bubbles During Mixing
Minimizing air bubbles is paramount for achieving ultra-clear epoxy’s signature transparency․ Just as Radio Ultra curates a clear signal, careful technique yields bubble-free results․
Avoid rapidly stirring or pouring, which entrains air․ Gently scrape the sides and bottom of the mixing container, lifting and folding the mixture instead of whisking․
Consider a slow-speed mixer attachment for larger batches․
Allow the mixed epoxy to sit for a few minutes, letting bubbles naturally rise to the surface before pouring – a patient approach, like building a perfect playlist․

Pouring and Application
Controlled pouring is key; mimic Radio Ultra’s consistent broadcast․ Slowly dispense epoxy, utilizing layering for depth, and ensure complete mold coverage for flawless results․
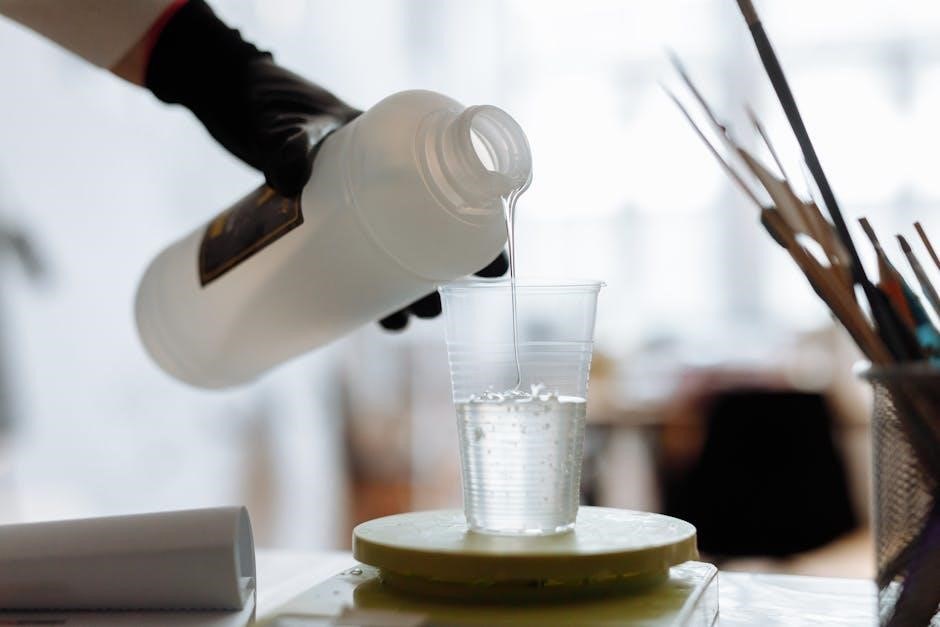
Slow and Controlled Pouring
Achieving a flawless finish with ultra clear epoxy hinges on a deliberate pouring process․ Just as Radio Ultra carefully curates its alternative music selection, you must approach the pour with precision․ Begin by dispensing the mixed epoxy in a thin, steady stream, avoiding sudden movements or large volumes in one spot․
This prevents excessive heat buildup and minimizes the risk of bubbles forming․ Think of it like building a playlist – gradual additions create a harmonious flow․ Control the flow rate to ensure even distribution across the surface, especially when working with larger projects or intricate molds․ A slow, controlled pour is the foundation for a crystal-clear result․
Layering Techniques for Deep Pours
For projects requiring significant depth, layering is crucial, mirroring how Radio Ultra introduces new artists gradually․ Pour epoxy in multiple thin layers, allowing each layer to partially cure before adding the next․ This minimizes heat generation and prevents cracking or warping, similar to building a playlist with carefully selected tracks․
Typically, layers of ¼ to ½ inch are ideal․ Between layers, ensure the surface is free of dust․ Patience is key – rushing the process can compromise the final clarity․ Like a well-crafted musical arrangement, layering builds complexity and strength․
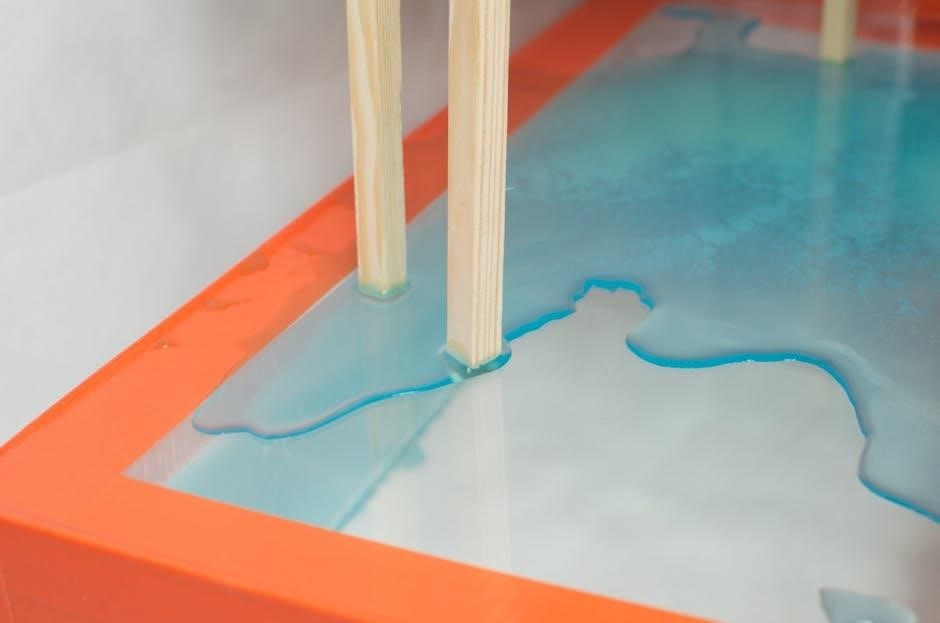
Working with Molds and Forms
When utilizing molds or forms, thorough preparation is paramount, akin to Radio Ultra’s dedication to showcasing diverse musical styles․ Ensure your mold is clean, sealed, and capable of withstanding the epoxy’s curing heat․ Release agents are vital to prevent sticking, allowing for easy demolding – much like a smooth transition between songs․
Consider mold flexibility; rigid molds may require more release agent․ Carefully pour epoxy into the form, avoiding rapid filling․ Like building a musical preference profile, precision yields optimal results․
Removing Air Bubbles
Air bubbles compromise clarity, similar to static disrupting a radio signal like on Radio Ultra․ Gentle heat or debubbling chambers effectively release trapped air, ensuring a pristine finish․
Using a Heat Gun or Torch
Employing a heat gun or torch is a common technique for eliminating surface bubbles in freshly poured ultra clear epoxy․ The gentle warmth reduces surface tension, allowing bubbles to rise and pop․
Maintain a safe distance – approximately 4-6 inches – and use a sweeping motion to avoid overheating or scorching the epoxy․
Similar to tuning a radio station like Radio Ultra, precision is key․ Too much heat can cause discoloration or even damage the resin․
A quick pass is usually sufficient; patience and observation are crucial․ Remember, the goal is to gently coax bubbles out, not to cook the epoxy!
Debubbling Chambers
Debubbling chambers offer a professional solution for removing air bubbles from ultra clear epoxy, utilizing a vacuum to draw them out․ These chambers create a controlled environment, ensuring a crystal-clear finish․
The process mimics refining a playlist, like Radio Ultra curating the best alternative tracks – removing imperfections for optimal quality․
Place your poured epoxy project inside, seal the chamber, and activate the vacuum pump․
Monitor carefully; excessive vacuum can cause issues․ Debubbling chambers are an investment, but yield consistently superior results, especially for deep pours․
Patience and Observation
Success with ultra clear epoxy demands patience․ Rushing any stage – mixing, pouring, or debubbling – can compromise the final clarity․ Like carefully curating a radio playlist, as Radio Ultra does, attention to detail is key․
Observe the epoxy closely throughout the process․ Watch for lingering bubbles, uneven surfaces, or any unexpected changes․
Resist the urge to interfere prematurely during curing․ Allow the epoxy to settle and self-level․
Consistent monitoring ensures a flawless, glass-like result, reflecting dedication and precision․

Curing Process
Optimal curing requires consistent temperature and time․ Like a band’s tour schedule, disruptions can impact the final outcome; avoid disturbances during this crucial phase․
Optimal Curing Time and Temperature
Achieving a flawless finish hinges on proper curing․ Most ultra-clear epoxy resins require a curing time of 24-72 hours, though this varies by product and layer thickness․ Maintaining a stable temperature between 70-75°F (21-24°C) is crucial for optimal results․
Lower temperatures will significantly extend the curing process, potentially leading to a soft or tacky finish․ Similar to a band carefully timing their performance, patience is key․ Avoid direct sunlight or drastic temperature fluctuations during curing, as these can cause cloudiness or imperfections․
Refer to the manufacturer’s instructions for specific recommendations regarding time and temperature․
Factors Affecting Cure Time
Several elements influence how long ultra-clear epoxy takes to fully harden․ Ambient temperature is paramount; colder environments dramatically slow the process, mirroring how a band might adjust their setlist based on the venue․ Thicker pours require longer curing times than thin coats, as the resin needs to fully set throughout its depth․
Humidity levels can also play a role, potentially affecting clarity․ The specific epoxy formulation itself is a key factor, with different resins having varying cure speeds․ Finally, the resin-to-hardener ratio must be precise – deviations will impact the cure․
Avoiding Disturbances During Curing
Maintaining a stable environment during curing is crucial for optimal results․ Just as Depeche Mode cautiously planned their tour after Ultra, avoid any vibrations or movement that could disrupt the epoxy’s setting process․ Dust or debris falling onto the surface can cause imperfections, mirroring unwanted noise in a radio broadcast․
Protect the project from pets, children, and accidental bumps․ Temperature fluctuations should also be minimized․ Patience is key; resist the urge to check or touch the epoxy before it’s fully cured, ensuring a flawless, clear finish․

Finishing and Polishing
Achieving a pristine, glass-like surface requires careful sanding and polishing․ Like curating a perfect playlist for Radio Ultra, refinement is essential for brilliance․
Sanding Techniques for a Smooth Surface
Begin with a coarser grit sandpaper (around 220) to remove imperfections and level the epoxy surface․ Progress through increasingly finer grits – 320, 400, 600, and even up to 800 or higher – for a flawlessly smooth finish․
Wet sanding is highly recommended; keep the surface and sandpaper lubricated with water to prevent clogging and minimize scratches․
Employ a sanding block for even pressure distribution, avoiding uneven areas․
Just as Radio Ultra carefully selects songs, methodical sanding builds a foundation for ultimate clarity, mirroring the station’s dedication to quality sound;
Inspect frequently for scratches and adjust your technique accordingly․
Polishing to Achieve Maximum Clarity
After sanding, polishing unveils the true brilliance of ultra-clear epoxy․ Utilize a polishing compound specifically designed for resins, applying it with a polishing wheel attached to a rotary tool․
Start with a cutting compound to remove fine scratches, then switch to a polishing compound for a high-gloss shine․
Like a DJ curating a playlist on Radio Ultra, gradual polishing refines the surface․
Apply gentle pressure and work in sections, frequently changing polishing pads to avoid contamination․
The goal is a mirror-like finish, reflecting light beautifully․
Applying a UV Protectant (Optional)
While ultra-clear epoxy boasts initial clarity, prolonged UV exposure can cause yellowing․ A UV protectant spray acts as a shield, preserving the resin’s pristine appearance․
Apply several thin, even coats, allowing each to dry completely before the next – similar to layering sounds on a Radio Ultra broadcast․
Ensure adequate ventilation during application․
Choose a protectant specifically formulated for epoxy resin to avoid clouding or discoloration․
This step extends the life and beauty of your project, maintaining its initial brilliance for years to come․