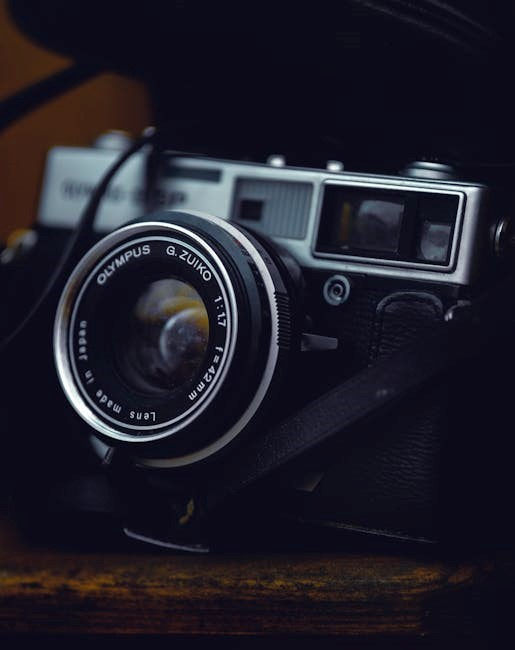
The Olympus OM10 is a compact and user-friendly 35mm SLR camera designed for both beginners and enthusiasts, offering a blend of automatic and manual controls.
Its lightweight design, ease of use, and versatility make it a popular choice for photographers seeking a balance between convenience and creative control in their work.
1.1 Overview of the Olympus OM10 Camera
The Olympus OM10 is a 35mm SLR camera known for its compact and lightweight design, making it highly portable for photographers. It features aperture priority and manual exposure modes, offering flexibility for both automatic and manual shooting. The camera is ideal for beginners and enthusiasts alike, providing a user-friendly interface while allowing creative control over settings. Its durability and ergonomic design ensure a comfortable shooting experience, making it a reliable choice for capturing high-quality images.
1.2 History and Significance of the OM10
The Olympus OM10, introduced in the 1970s, marked a significant step in Olympus’ SLR camera lineup, targeting amateur photographers with its simplicity and affordability. It was part of the OM series, known for compact and lightweight designs, which revolutionized SLR cameras. The OM10 was praised for its user-friendly interface and aperture priority mode, making it accessible to newcomers while offering enough control for enthusiasts. Its popularity endured, cementing its place in photography history as a versatile and approachable tool for capturing memories.
1.3 Purpose of the User Manual
This manual is designed to guide users in understanding and operating the Olympus OM10 effectively. It provides detailed instructions on camera setup, shooting modes, and maintenance. The manual ensures users can maximize the camera’s features, troubleshoot common issues, and enhance their photography skills. Whether for beginners or experienced photographers, it serves as a comprehensive reference for optimal use of the OM10, helping to unlock its full creative potential and improve overall photography results consistently.
Key Features and Specifications
The Olympus OM10 features a compact, lightweight design, manual focus capabilities, and aperture priority mode, making it versatile for both automatic and manual shooting experiences with Zuiko lenses.
2.1 Design and Build Quality
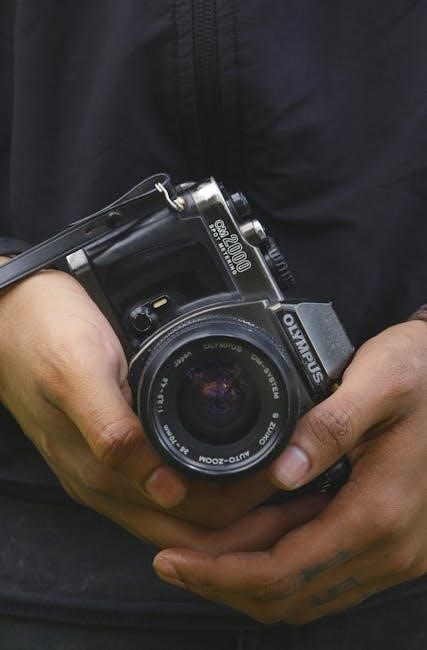
The Olympus OM10 boasts a lightweight and compact design, weighing just 440 grams without the lens, making it highly portable. Its robust construction features a durable metal chassis with plastic exterior components, ensuring a balance of strength and portability. The ergonomic layout provides easy access to controls, while its compact size makes it comfortable to hold and carry, ideal for photographers seeking a practical yet sturdy camera for everyday use.
2.2 Aperture Priority and Manual Modes
The Olympus OM10 offers two primary shooting modes: Aperture Priority and Manual. In Aperture Priority mode, users set the aperture, and the camera automatically adjusts the shutter speed for optimal exposure. For greater control, Manual mode allows photographers to independently adjust both aperture and shutter speed. This dual functionality caters to both casual shooters and professionals, providing flexibility and precision in various lighting conditions, ensuring high-quality results.
2.3 Lens Compatibility and Accessories
The Olympus OM10 is compatible with a wide range of Olympus Zuiko lenses, including the standard 50mm f/1.8 lens, offering versatility for various photography needs. It also supports the Olympus Electronic Flash system, such as the T20 flash unit, enhancing low-light performance. Additional accessories like lens filters and camera straps are available, further expanding the camera’s functionality and adaptability for different shooting scenarios and personal preferences.

Parts and Controls of the Olympus OM10
The Olympus OM10 features an intuitive design with key controls such as the mode dial, shutter release, and ASA/ISO dial, ensuring easy operation for photographers of all levels.
Its compact body houses essential components like the lens mount, viewfinder, and film advance lever, making it a user-friendly tool for capturing high-quality images effortlessly.
3.1 Exterior Components and Their Functions
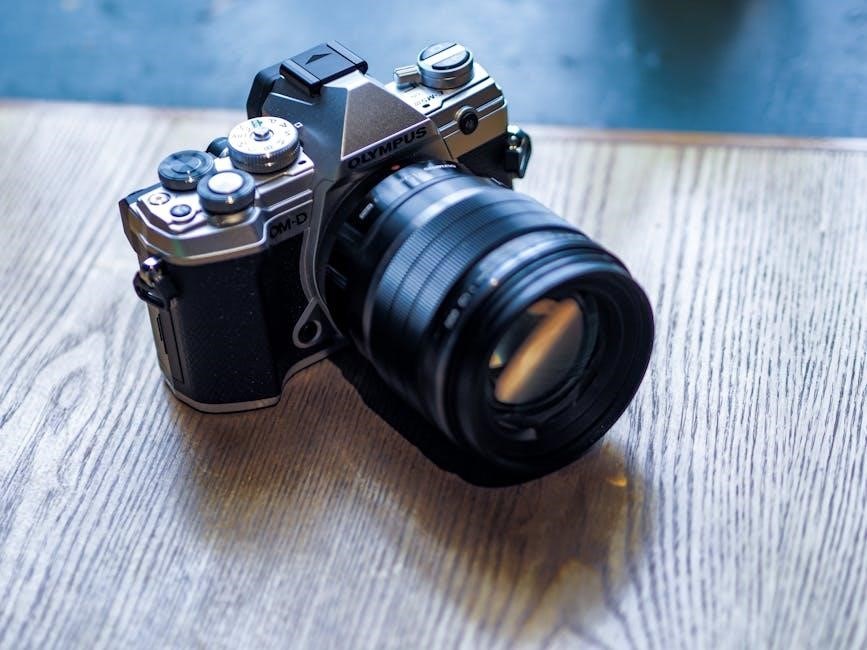
The Olympus OM10’s exterior features a mode dial for selecting automatic or manual modes, a shutter release button for capturing images, and an ASA/ISO dial for setting film sensitivity. The lens mount allows for easy attachment of compatible Zuiko lenses, while the viewfinder provides a clear preview of the scene. Additional controls include the film advance lever and a rewind knob, ensuring efficient film handling.
These components are thoughtfully designed to enhance usability, making the OM10 both functional and ergonomic for photographers seeking a seamless shooting experience.
3.2 Lens and Viewfinder Details
The Olympus OM10 is compatible with a wide range of Zuiko lenses, offering versatility for various photography needs. The viewfinder provides a bright, clear view of the scene, featuring a microprism spot for precise manual focusing. Additional information such as aperture, shutter speed, and exposure compensation is displayed within the viewfinder, aiding photographers in making accurate adjustments; The lens mount is designed for easy attachment and detachment, ensuring quick lens changes during shoots.
The combination of a high-quality lens system and an intuitive viewfinder makes the OM10 a reliable tool for capturing sharp, well-composed images in diverse lighting conditions.
Setting Up the Camera
Setting up the Olympus OM10 involves installing batteries, attaching lenses, and ensuring all components are properly secured for optimal performance and ease of use.
4.1 Installing Batteries
The Olympus OM10 requires 4 SR44 batteries for operation. Open the battery compartment on the bottom by sliding it forward. Insert batteries with the + terminal facing up. Ensure proper alignment and secure the compartment tightly. Avoid mixing old and new batteries for consistent power. Battery life typically lasts several months under normal use. Always check battery levels before extended shooting sessions to prevent unexpected shutdowns.
4.2 Attaching Lenses and Accessories
To attach a lens, align the lens mount with the camera’s mount and twist clockwise until it clicks securely. Handle lenses with care to avoid damage or scratches. For accessories, such as flash units, slide them onto the hot shoe and ensure proper contact. Always use Olympus-compatible accessories for optimal performance. Securely fasten any additional attachments, like lens hoods or filters, by twisting them gently until they lock into place.
Loading Film
The Olympus OM10 uses 35mm film, offering an straightforward loading process. It supports various film speeds, making it ideal for both beginners and experienced photographers alike.
5.1 Step-by-Step Film Loading Process
Open the camera back by pulling the film rewind knob. Insert the film canister, pulling the leader to align with the red mark on the spool. Close the back gently.
Advance the film by turning the rewind knob until it stops. Ensure the film counter resets to “S” for proper framing. Your OM10 is now ready for shooting with the loaded film.
5.2 Film Speed and ISO Settings
Set the film speed (ISO) using the dial on the lens mount to match your film type. Common ISO ranges are 25-3200. Rotate the dial until the ISO number aligns with the marker. Proper ISO setting ensures accurate exposure. Always refer to the film canister for the correct ISO value. Correct settings optimize image quality and prevent under or overexposure, making it essential for achieving the best results with your Olympus OM10.
Shooting Modes
The Olympus OM10 offers Aperture Priority and Manual Modes. Aperture Priority automatically adjusts shutter speed, while Manual Mode provides full control over both aperture and shutter speed.
6.1 Aperture Priority Mode
In Aperture Priority Mode, the Olympus OM10 allows users to set the desired aperture, while the camera automatically adjusts the shutter speed for optimal exposure. This mode is ideal for photographers who want creative control over depth of field without manually adjusting both aperture and shutter speed. The camera ensures accurate exposures, making it suitable for various lighting conditions and scenes, enhancing the shooting experience with ease and precision.
6.2 Manual Exposure Mode
Manual Exposure Mode on the Olympus OM10 offers full creative control by allowing users to manually set both aperture and shutter speed. This mode is ideal for experienced photographers who prefer precise control over exposure settings. The built-in light meter provides guidance, helping users achieve accurate exposures. By adjusting both parameters, photographers can tailor the image to their artistic vision, making Manual Mode a powerful tool for capturing unique and personalized results in various lighting conditions.

Exposure Control
The Olympus OM10 allows precise control over exposure via aperture, shutter speed, and ISO settings. Aperture Priority and Manual Modes provide flexibility for creative photography, ensuring optimal results in various lighting conditions while maintaining portability and ease of use.
7.1 Understanding Aperture, Shutter Speed, and ISO
Aperture regulates light entry through the lens, with lower f-stops (e.g., f/2.8) allowing more light and shallower depth of field. Shutter speed controls exposure duration, freezing motion at faster speeds (1/1000th of a second) or creating blur at slower ones. ISO adjusts sensitivity, with lower settings (ISO 100) suited for bright light and higher settings (ISO 400) for low-light conditions, though higher ISOs may introduce grain. Balancing these elements ensures optimal exposure in various lighting scenarios, leveraging the OM10’s manual and aperture-priority modes for creative control.
7.2 Adjusting Exposure Compensation
Exposure compensation on the Olympus OM10 allows fine-tuning of the camera’s automatic settings. In aperture priority mode, use the exposure compensation dial to adjust brightness by ±2 EV in 1/3-stop increments. For manual mode, adjust aperture or shutter speed based on the built-in light meter’s readings. Positive compensation brightens images (e.g., for backlit subjects), while negative compensation darkens them (e.g., for high-contrast scenes). This feature ensures precise control over the final exposure, enhancing creativity and accuracy in various lighting conditions.
Focusing and Metering
The Olympus OM10 features manual focusing and a built-in light meter for precise exposure control. The clear viewfinder aids in accurate focus and metering adjustments.
8.1 Manual Focusing Techniques
Manual focusing on the Olympus OM10 allows precise control over your images. Use the focusing ring on the lens to achieve sharp results. Align the subject within the viewfinder’s focusing screen for clarity. For optimal accuracy, use the depth-of-field preview button to assess focus before shooting. This technique ensures your shots are crisp and well-defined, leveraging the camera’s manual capabilities effectively.
8.2 Using the Built-In Light Meter
The Olympus OM10 features a built-in light meter to help achieve accurate exposures. Press the shutter button halfway to activate the meter, which displays readings in the viewfinder. Use the LEDs to check if the exposure is over, under, or correctly set. Adjust the aperture or shutter speed accordingly for precise control. This tool is essential for both aperture priority and manual modes, ensuring well-balanced exposures in various lighting conditions.

Flash and Accessories
The Olympus OM10 supports external flash units like the T20 and T32, offering enhanced lighting control. Accessories include flash adapters and compatible units, expanding creative possibilities.
9.1 Using the Olympus Electronic Flash
The Olympus Electronic Flash, such as the T20 or T32, provides versatile lighting solutions for the OM10. To use, attach the flash to the hot shoe, ensuring proper synchronization. The flash automatically adjusts for exposure when connected. For manual control, set the flash to the same aperture as the lens. Test firing is recommended before shooting to ensure proper function. Use indirect light for softer results, enhancing your photography experience with the OM10.
9.2 Compatible Flash Units and Accessories
The Olympus OM10 supports various electronic flash units, including the Olympus T20 and T32, which are designed to integrate seamlessly with the camera. These flashes offer automatic and manual modes, ensuring precise control over lighting. Additional accessories like flash adapters and diffusers can enhance creativity. For off-camera use, a sync cord or remote trigger is recommended. Always test compatibility and settings before shooting to achieve optimal results and expand your photographic capabilities with the OM10.
Maintenance and Care
Regularly clean the lens and viewfinder with a soft cloth to prevent scratching. Store the camera in a dry, cool place away from direct sunlight to maintain functionality and longevity.
10.1 Cleaning the Camera and Lens
Cleaning the Olympus OM10 requires care to maintain its optical and mechanical performance. Use a soft, dry microfiber cloth to gently wipe the camera body and lens surfaces. Avoid harsh chemicals or abrasive materials that could damage the finish or glass elements. For the lens, breathe lightly onto it and wipe with a circular motion using a lens cleaning tissue. Regular cleaning prevents dust and smudges from affecting image quality during shoots.
10.2 Storing the Camera Properly
The Olympus OM10 should be stored in a cool, dry place to prevent moisture damage. Use the original case or a padded bag to protect it from dust and physical harm. Avoid direct sunlight and extreme temperatures, as they can degrade mechanical and electronic components. Store the lens with a protective cap to prevent scratches. Keep the camera away from batteries during long-term storage to avoid corrosion. Regularly check the storage conditions to ensure optimal preservation of your OM10.
Troubleshooting Common Issues
Common issues with the Olympus OM10 include battery performance and film loading problems. Ensure proper film loading, check battery life, and consult the manual for solutions. If unresolved, seek professional assistance.
11.1 Resolving Battery and Shutter Issues
If the Olympus OM10 fails to power on, ensure batteries are correctly installed and not expired. Clean the battery contacts with a soft cloth to improve connectivity. For shutter issues, check if the shutter button is functioning properly or if debris is obstructing its movement. If problems persist, consult the manual or contact a professional for servicing to maintain optimal camera performance and longevity.
11.2 Dealing with Film Loading Problems
If the film fails to advance or appears misaligned, ensure the film is properly seated and the spool is securely attached. In a dark environment, open the camera back and check the film’s alignment with the take-up spool. Gently guide the film leader into the spool if necessary. If issues persist, rewind the film partially and reload it, ensuring the film is not twisted or obstructed during the process.
Resources and References
For further guidance, download the official Olympus OM10 manual or explore online forums and communities dedicated to Olympus cameras for troubleshooting and expert advice.
12.1 Downloading the Official Olympus OM10 Manual
The official Olympus OM10 manual is readily available online, offering detailed instructions for camera setup, shooting modes, and troubleshooting. Visit trusted sources like the Olympus website or reputable camera manual libraries to download the PDF guide. This comprehensive resource ensures you maximize your camera’s potential and resolve any operational queries efficiently. Accessing it is straightforward, with many platforms providing free downloads for user convenience.
12.2 Online Communities and Forums
Active online communities and forums dedicated to the Olympus OM10 provide valuable resources, tips, and support for users. Platforms like Flickr groups, Reddit, and Facebook communities offer spaces to share experiences, ask questions, and learn from fellow photographers. Additionally, websites like Butkus Archives and 35mm-compact.com host extensive libraries of camera manuals and troubleshooting guides. These communities foster collaboration and help users optimize their OM10 experience, making them indispensable for both beginners and enthusiasts.
The Olympus OM10 is a timeless choice for photographers, blending simplicity with creative control. Its compact design and intuitive features make it ideal for both beginners and enthusiasts.
By mastering the OM10, users can unlock their full photographic potential, capturing stunning images with ease and precision, while exploring the joys of analog photography.
13.1 Final Tips for Getting the Most Out of the OM10
Experiment with different films and settings to discover your personal style. Regularly clean the lens and camera body to maintain image quality. Always carry extra batteries and film for extended shoots. Practice manual focusing for precise control. Explore various accessories, like compatible flashes, to enhance your photography experience. Embrace the OM10’s portability and take it on all your adventures to capture life’s fleeting moments with ease and creativity.
13.2 Encouragement to Explore and Experiment
Embrace the joy of photography with the OM10 by experimenting with different techniques and settings. Try various films, apertures, and shutter speeds to uncover your unique style. Don’t hesitate to explore manual controls for creative freedom. The OM10’s portability makes it an ideal companion for capturing spontaneous moments. Remember, photography is about expression, so enjoy the process, learn from your results, and keep shooting to refine your craft and tell compelling stories through your images.